How to Edit Several Gutenberg Blocks at Once on WordPress


Hooray! You already own an actual WordPress website. Maybe you’re just a contributor, which is also great. In any case, you have used the WordPress editor and are happy with the results.
What you want now is to get better at Gutenberg and the editing content inside WordPress. Simple text-formatting at block level is not enough for you anymore.
Editing blocks, one by one, seems inefficient to you by now. A question continues to loom in your head: how do I edit several Gutenberg blocks at once on WordPress in order to speed up my content creation process? You are not the first person looking for a swift solution. Here are some.
Allow Technical Progress to Enter Your Daily Routine
Editing more than one element at once is probably one of the most underrated advantages of Gutenberg compared to the classic editor, which many people still prefer. Sure, we get used to things and change is hard. Once we master new tools, however, we get more confident.
Luckily humanity has adapted over millions of years and thus we don’t live like Neanderthals anymore. As tools improve, using them sometimes becomes more difficult for those who are more familiar with older “interfaces.” At Namecheap, we’re here to help.
There are many reasons to edit more than one block at once. It’s not just efficiency. It’s also sanity.
Repetitive and often tedious tasks such as adding or removing the same element again and again can become a nuisance.
“Oh no!” you may be thinking. “I’m not an advanced user or a WordPress expert! I don’t even want to deal with such complex features.”
The good news is this: it starts very easy. Once you realize just how easy it can be to edit more than one block at once your workflow performance appetite returns! Let’s start with a very simple use case.
Selecting, Copying or Deleting More than One Block
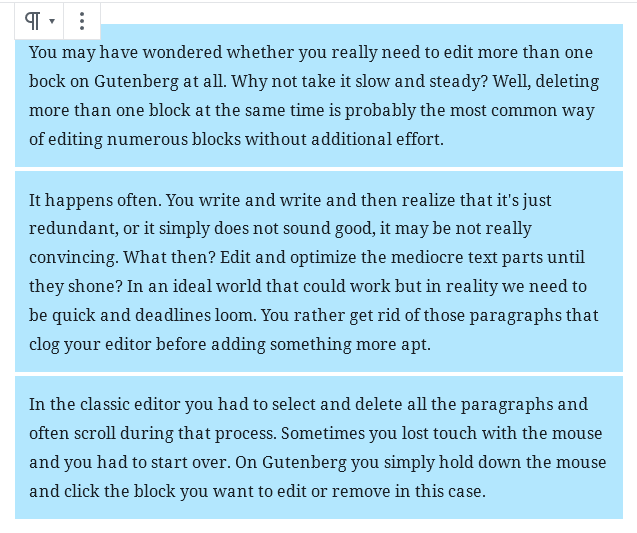
You may wonder whether you really need to edit more than one block on Gutenberg at all. Why not take it slow and steady? Well, deleting more than one block at the same time is probably the most common way of editing numerous blocks without the additional effort.
It happens often. You write and write and then realize that it’s just redundant, or it simply does not sound good, it may be not really convincing. What then? Edit and optimize the mediocre text parts until they shine? In an ideal world that could work but in reality we need to act quick when deadlines loom. You rather get rid of those paragraphs that clog your editor before adding something more precise or eloquent.
In the classic editor you had to select and delete all the paragraphs while keeping the left mouse button pressed, and often scroll during that process. Sometimes you lost touch with the mouse and you had to start over or if you selected too much, the same thing. With Gutenberg you simply press the “Shift” key on your keyboard and hold down the mouse, clicking the block you want to edit or remove in this case:
Be aware that it does not work immediately. Only when you click the second block do both blocks become blue. Until then it appears as if WordPress wanted to select text within the actual paragraph, not all of it. Once these blocks get selected, click the “Del” key on your keyboard to simply delete them.

Some people do not like to use the keyboard or don’t even have one. That’s why when selecting, holding down the left mouse key and moving the blocks over to select with the mouse button still pressed does the same.
While the blocks are still displayed with a blue background, you can click the right mouse button and then select “cut”. Apparently “delete” is not an option you can choose here but “cut” will do. The only difference is that you still have the text saved temporarily and can paste it elsewhere, just in case.
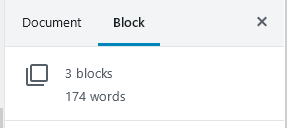
While you select those blocks, WordPress will tell you how many of them you selected and how many words they contain. Why? Sometimes not all selected text is visible. This way you can double-check whether or not you selected the correct number of blocks to delete.
One would also expect that WordPress would let you do more with those selected blocks than just listing them and enabling you to delete or copy them all at once. Yet, by default, there are no other visible options.This being said, there is certainly room for improvement regarding upcoming WordPress versions. So tell us, what kind of features would you like to see in this context? Let us know in the comments below!

Preparing for Changes Down the Road by Using Custom Blocks
Editing Gutenberg blocks once they are already added and contain content may be not such a good idea after all. For example, you could accidentally break things by deleting too much. Ideally you’d be prepared for such an eventuality upfront. So, why not make several blocks editable at once?
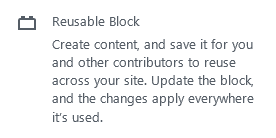
An advanced way to make blocks simultaneously editable in the future is to create a custom block and use it for several elements. This way you don’t have change the block type each time for every block you want to customize text-formatting down the road.
The feature we’re referring to here is called a “reusable block” on WordPress and does not only apply to formatting but also to the actual content in the block. When you’re publishing lyrics with a repetitive chorus you can just write it down once and add it multiple times:
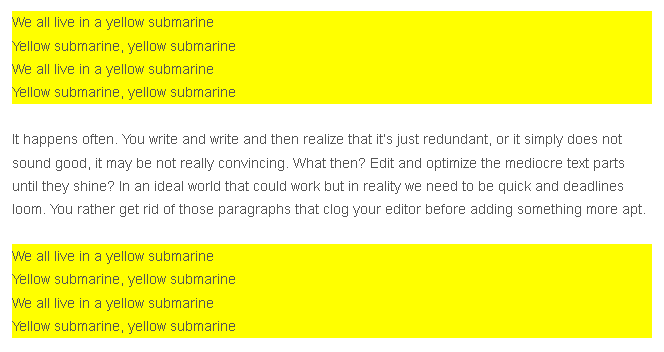
So what happens when we decide to repaint the yellow submarine and make it red instead? We change the background color once and we change the lyrics at the same time but all the blocks change simultaneously!
This is, of course, not a feature for publishing existing lyrics as you don’t have to change them but rather for those who write lyrics themselves. You get the general idea, though: change once but see the change multiple times.
How exactly do you add a reusable block on Gutenberg?
- Go to editor window.
- Add a simple block (a paragraph).
- Write some text.
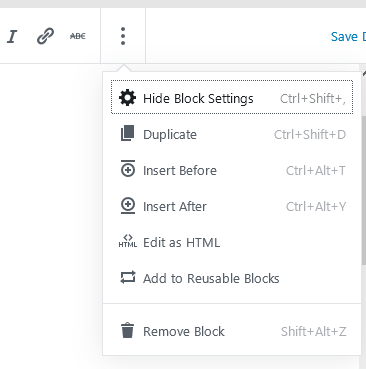
- Click on three vertical dots menu above the editor.
- Select “Add to Reusable Blocks” option from the drop down menu (the second to last one):
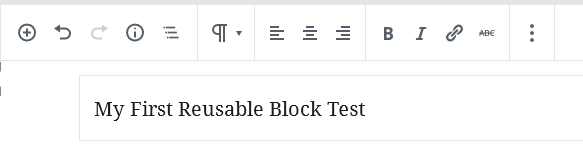
Now you can edit the reusable block name. We just called it “My First Reusable Block” for testing purposes. It’s basically the same text we put inside the block itself to make things simpler.

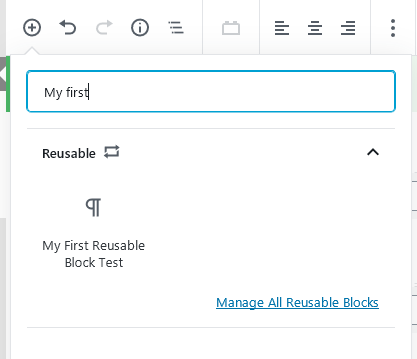
Once you hit “save” the block is ready to get used or edited. You can find it by clicking the “plus in a circle” manu icon on the top-left above the Gutenberg editor. When you type in the name of that reusable block or just parts of it should appear like this, see the screenshot below:
You can also combine the two techniques suggested above. Just select two or more blocks and add all of them at once to one reusable block.
When All Else Fails – Copy and Paste to Your Editor of Choice
Perhaps you were wondering earlier how I changed the background color of the “Yellow Submarine” lyrics. I used custom HTML. This is also the last resort for changing multiple blocks at once. The built-in features are still a bit specific: deleting, copying, and reusing text is not always sufficient.
When all else fails you can simply view the code and edit it. In Gutenberg it may seem harder at first than in the classic editor but it’s just a matter of finding the right option.
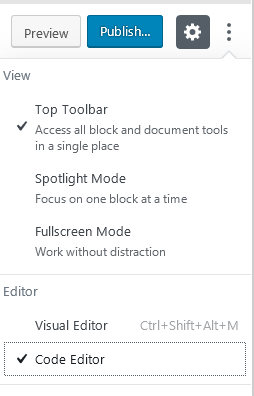
In the top right corner you can click the three-dotted icon and select “Code Editor” from the drop-down menu. Then you can simply “select all” by using the Ctrl+A keys, copy everything, and paste it into your favorite text editor to manipulate it further.
Legacy tools like Ultraedit or Notepad++ are very powerful when performing search and replace operations that allow you to edit multiple instances of tags or words, all at once. Then you can paste the code back to WordPress/Gutenberg.
Of course you may instead prefer a modern text editor like Brackets from Adobe or the popular Sublime editor (both are free open-source software) but the outcome is the same: you use the tool of your choice for the hard work and return to WordPress for the fun.
The best way to edit your text content is to use a third-party tool like Google Docs or Zoho Writer first and then copy and paste it to the WordPress backend. It’s always wise to have a backup, just in case.
Some people, especially those who are or were web developers, might prefer a code view from the start.
When you know HTML you can enjoy writing your posts in your favorite text editor and once you’re ready, copy and paste it into WordPress. Gutenberg does a great job of copying content and code from Google Docs. Why not do the same from your other tool of choice?
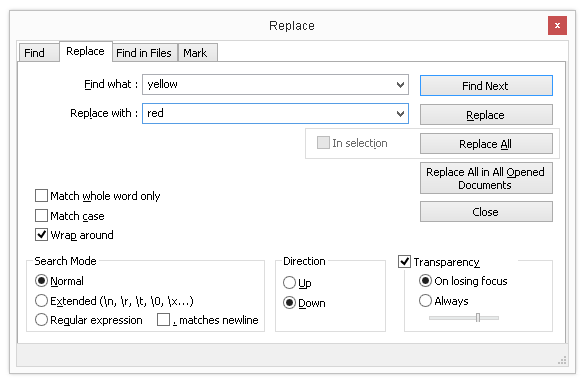
Notepad++ offers many tools that edit more than one item at once. The most powerful one? The search and replace feature dialog box. It saves a lot of time over the years. The “Replace All in All Opened Documents” is particularly powerful. Using it can be risky, though. Be careful not to replace too much at once!
At the end of the day, Gutenberg excels at simplifying the editing process. For advanced operations on more than one item, standalone text editors still offer way more options.
More articles from us!
How to make money with ads on your WordPress blog
How to import Google Docs to WordPress
